Integration
The SeaMAX Application Programming Interface can be used directly in a native Visual C++ project. The project must be configured properly to access the API definitions and link to the API implementation during the the build process.
Project Properties
The Visual C++ project properties must be updated to find and use SeaMAX API install path (C:\Program Files\Sealevel Systems\SeaMAX\ or C:\Program Files (x86)\Sealevel Systems\SeaMAX\). This can be accomplished by the following:
-
Choose "Project->Properties" from the menu bar in Visual Studio
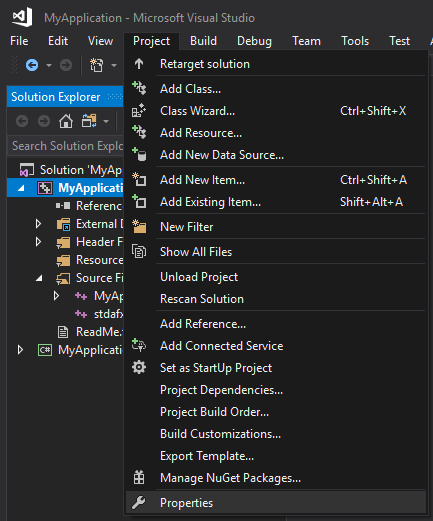
Figure 1: Visual Studio Project Properties
-
Select the "VC++ Directories" heading
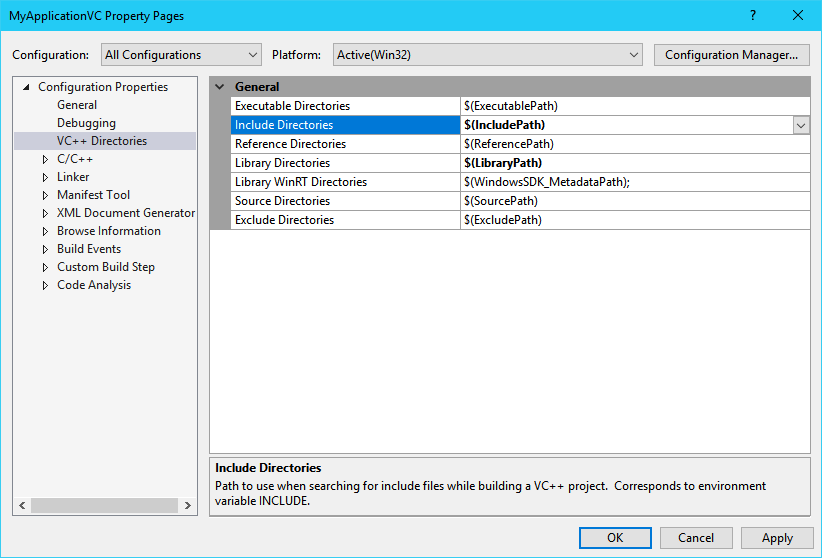
Figure 2: Visual Studio Directories
-
Select the "Include Directories" row
-
Click the drop-down button, and select the "Edit..." option; a new dialog will appear
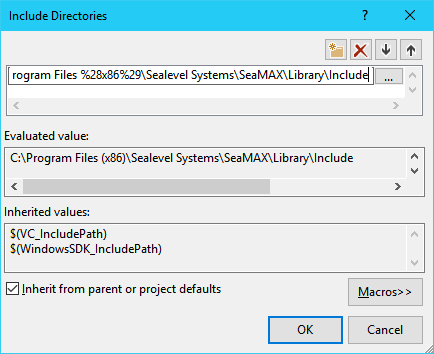
Figure 3: Updating the project Include Path
-
Click the new folder button to create a new line
-
Click the ellipsis "..." on the new line, and navigate to the SeaMAX installation include path ("Library\Include")
-
Click "OK" to finish adding the include directory
-
Select the "Library Directories" row
-
Click the drop-down button, and select the "Edit..." option; a new dialog will appear
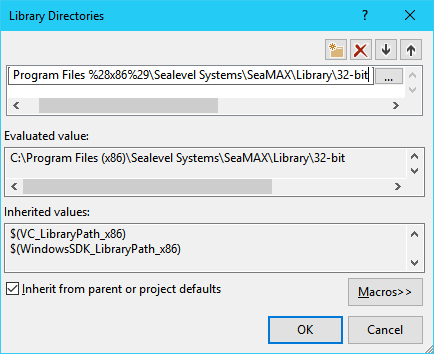
Figure 4: Updating the project Library Directories path
-
Click the new folder button to create a new line
-
Click the ellipsis "..." on the new line, and navigate to the SeaMAX installation library path
("Library\32-bit" or "Library\64-bit" depending on the target platform)
-
Click "OK" to finish adding the library directory
-
Select the "Linker->Input" heading
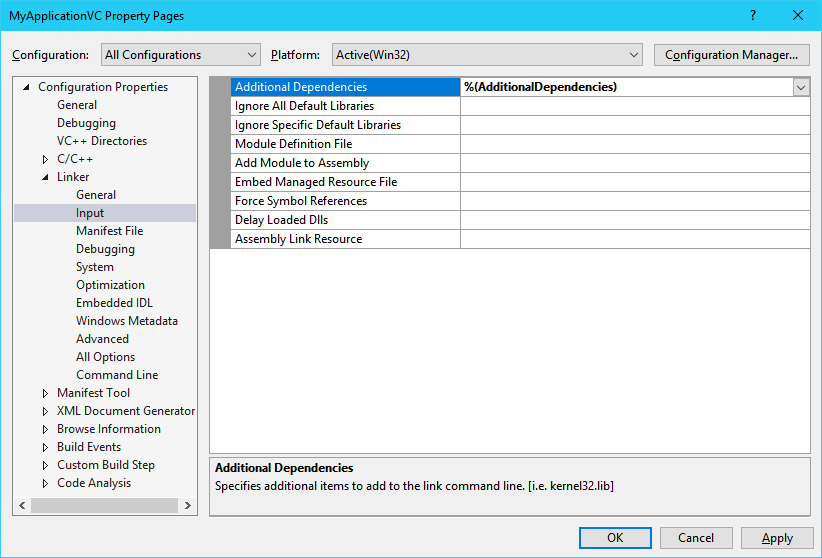
Figure 5: Visual Studio Linker Input
-
Select the "Additional Dependencies" row
-
Click the drop-down button, and select the "Edit..." option; a new dialog will appear
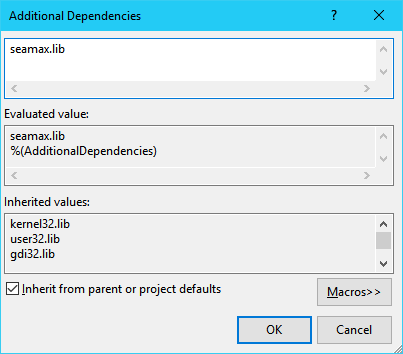
Figure 6: Updating the Additional Dependencies
-
Type "seamax.lib" on a new line
-
Click "OK" to finish adding the library
-
Select the "Build Events->Post-Build Event" heading
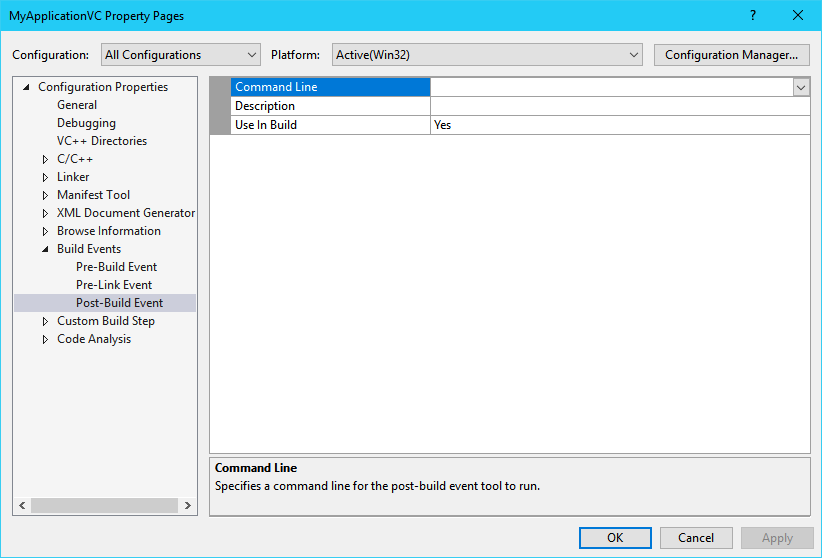
Figure 7: Visual Studio Post-Build Events
-
Select the "Command Line" row
-
Click the drop-down button, and select the "Edit..." option; a new dialog will appear
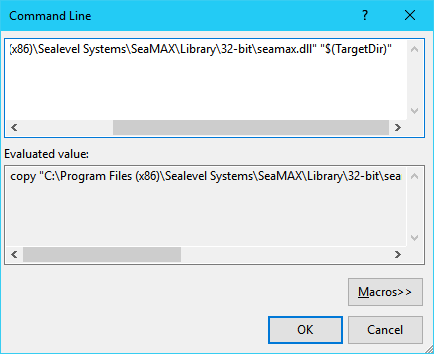
Figure 8: Updating the Post-Build Events Command Line
-
Type copy "[SeamaxLibDir]\seamax.dll" "$(TargetDir)", where [SeamaxLibDir] is the SeaMAX library installation library path ("Library\32-bit" or "Library\64-bit" depending on the target platform)
-
Optionally, type a description in the "Description" row
-
Click "OK" to finish adding the event
-
Click "Apply" to save the new properties
- Note
- The proceeding properties will need to be replicated for every configuration and platform combination that is desired.
API Function Definitions
Add the following include pre-processor definition to the beginning of the application source code:
#include <SeaMAX.h>
Example
The following is an example of how to call SM_Open() and SM_Close() within a Visual C++ project:
SM_HANDLE seamax;
if (SM_Open(&seamax, "COM1") < 0)
{
  // Error opening COM1
}

SM_Close(seamax); 